Time to get things put back together!
PHASE 2 - Tile Installation
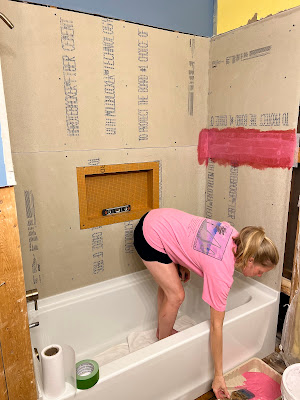
Up first was getting the space prepped for tile. After Keegan set the tub and plumbing he began hanging backboard on the tub surround for the new tile. My job was to decide on the niche placement & orientation.
Of course I couldn't make things easy and decided on a horizontal placement. This meant having to rework the studs and frame out a spot for the niche.
Up next, waterproofing.
This stuff looked like pepto bismol in a can. It goes on bubble gum pink and dries a bright red.
We used waterproof fabric strips on all the backboard joints & niche, then painted a layer on the baker board walls as well.
Now, for the exciting part, the tile!
We intended to do the tile install ourselves but ended up hiring a colleague to knock it out. With nesting mode starting to set in and a nursery that still needed to be painted, I was grateful for the help!
We dry laid a box of the marble floor tile to confirm the diagonal pattern.
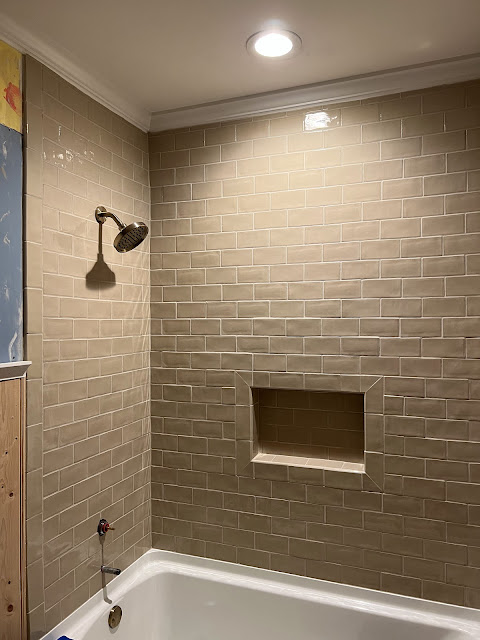
For the wall tile, we did a standard brick lay up to the ceiling.
I wanted the niche to have a picture frame detail and after a little trouble shooting (& convincing) we got the layout to work.
I'm thrilled with how it turned out!
I love the 'handmade' look of the wall tile, the subtle detail around the niche & the warmth of the color.
The diagonal marble gives a timeless feel & the dark brown coloring helps ground the space.
It's so exciting seeing our vision come to life - now bring it on Phase 3!


Post a Comment